Lately at work I’ve been having the worst of trouble getting PHP on my workstation to send mail. Previously it was a simple trek to a website to download a Windows build of sendmail.exe, but for some reason I cannot get access to it, so I have to go another route.
Enter hMailServer, a free, full-featured SMTP/POP/IMAP server for Windows with a pretty, shiny GUI configuration interface. All I really want to do is setup SMTP for localhost only but one could easily use hMailServer as a production mail server.
To start things off, lets make sure our php.ini directives are setup correctly. By correct, I mean PHP needs to be looking for our SMTP server on my local machine (localhost) at the default SMTP port (25), and, just in case, set a default from address:
1 2 3 4 5 6 7 | |
Looks good. Second step is to download and install hMailServer. This tutorial is working from version 5.2 build 356, but you should be able to use the latest stable or unstable version that you might desire.
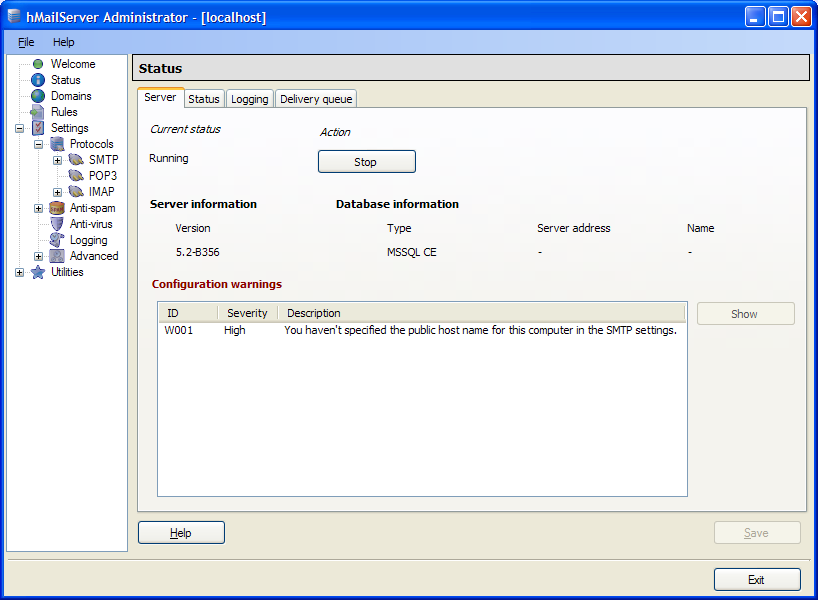
Once you’re installed and configured, run the administrative application. If you click over to status you will notice a message to the effect of “You haven’t specified the public host name for this computer in the SMTP settings.” That means we have some more configuration to do!
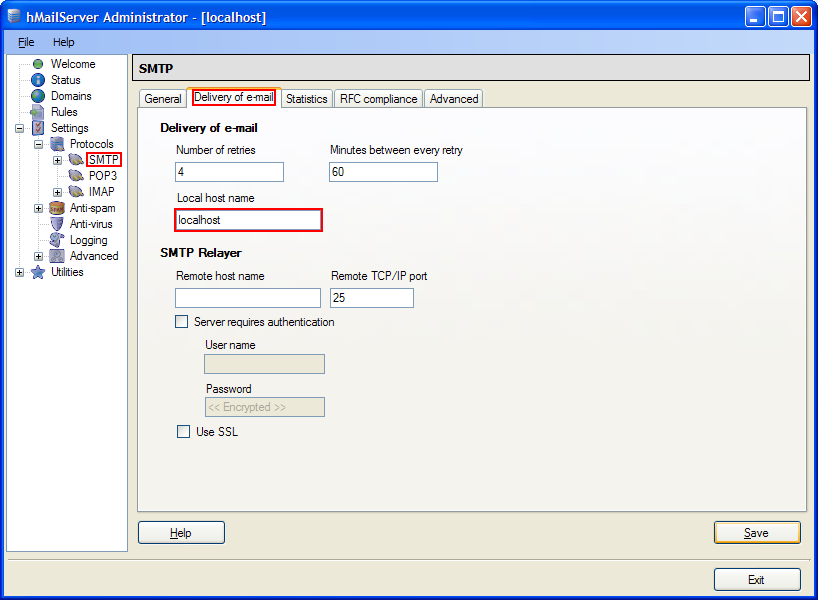
Now mosey on over to Settings » Protocols » SMTP, navigate to the “Delivery of e-mail” tab. We set our “Local host name” to “localhost” and click “Save”.
Next, for securities sake (as well as to ensure we don’t have to waste time configuring account as this is only a dev machine), go to Settings » Advanced » IP Ranges » My Computer. Un-check the POP3 and IMAP checkboxes under the “Allow Connections” as we don’t intend to receive mail, nor use the IMAP protocol. Then, un-check everything under “Requires SMTP authentication” as we want our PHP applications to have full reign. Finally, click “Save”. Remember, this is a dev box.
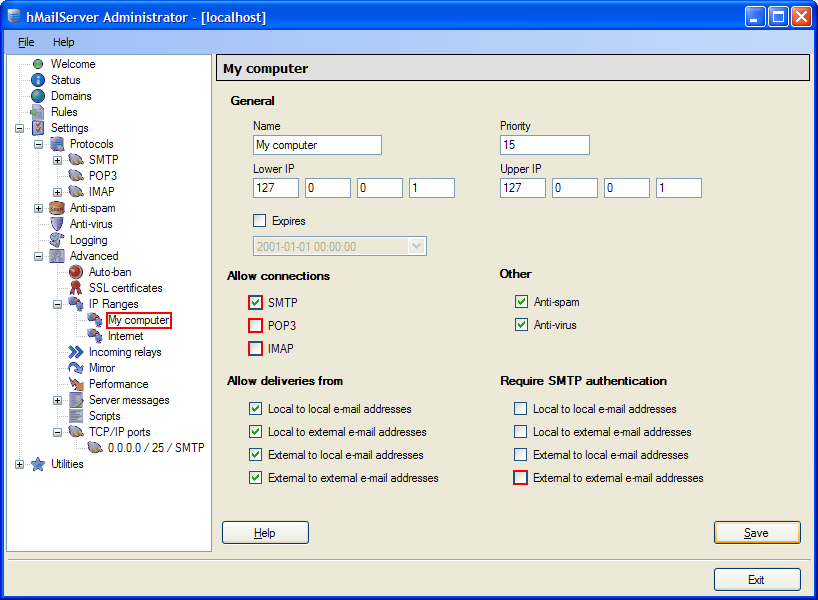
UNDER NO CIRCUMSTANCES SHOULD YOU USE THESE SETTINGS ON A BOX THAT WILL BE EXPOSING ITSELF TO THE INTERNET OR ON A PRODUCTION SERVER! However, since our local machine will obviously have internet connectivity, lets remove all access from outsiders!
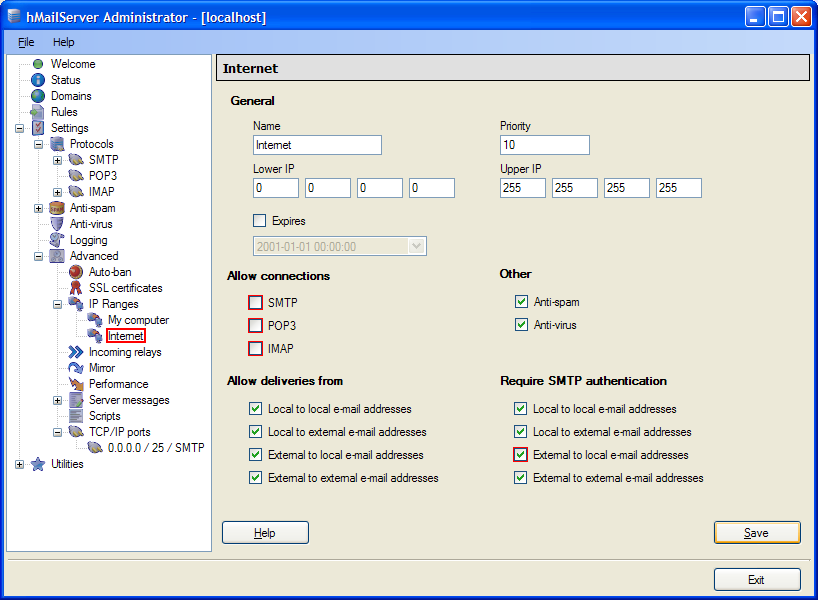
Navigate to Settings » Advanced » IP Ranges » Internet. Un-check EVERYTHING from “Allow connections” to deny outsiders any services, and, just in case, check EVERYTHING under “Require SMTP authentication” and click “Save”.
And voilà! We have a fully functioning SMTP server that our local PHP environment can use to send test email messages.
The nice thing about our administrative interface is if we go to Status, navigate to the “Logging” tab, and click “Start,” we can capture the dialogue between hMailServer and your PHP app when sending an email address (very useful for debugging).